Each day we get up wondering what changes Jim might feel that day. After a rough Monday, the last two days have been pretty good. Jim hasn't taken any more of the anti-nausea meds and hasn't needed to nap mid-day since Monday. He actually feels pretty good and has been working all day. He is still using the cane for support but I've seen him leave it behind when making some short walks around work or at the house. We were told to expect the changes to be like a roller coaster ride. Chemo patients "typically" have a slow decline (feeling the effects of the chemo), then bottoming out and slowing starting to improve, just in time for the next chemo. The ride then starts all over again although the effects happen faster and can hit a little harder with each treatment.
I have no doubt that Jim is surrounded in prayer and we thank you for that! We are very blessed to have family and friends willing to travel this road with us!
Wednesday, December 30, 2009
Monday, December 28, 2009
Update on Jim 12/28/09
Today we are 7 days post chemo # 1. Jim is noticing some side effects, mostly minor. His stomach is a little off, but he is still eating. He took his first anti-nausea pills this weekend. Getting a good nights sleep seems to be the biggest obstacle. He is up 4-5 times a night to use the bathroom. Not sure what that is all about as he isn't drinking anything more then normal - I'm guessing he is sleeping lighter. We'll be talking to the doc about that if this continues very long. He got up looking tired this morning and said he felt like he was "dragging butt". When we go home at lunch today I'm going to encourage him to lay down for a cat nap. We've gotten the okay to take long lunches whenever necessary if naps prove to be helpful. Getting up at 5:15 this a.m. may have been a mistake....
Wednesday, December 23, 2009
Update on Jim 12/23/09
We are now two days post chemo and Jim is doing very well. He has noticed a couple small things, i.e., food tasting a little funny, some puffiness (from the steroids), but for the most part he is feeling the same as he did before the chemo treatment.
Thank you for your continued prayers!
NEXT SCHEDULED APPT: Chemo #2 on Monday 1/11/10
Thank you for your continued prayers!
NEXT SCHEDULED APPT: Chemo #2 on Monday 1/11/10
Monday, December 21, 2009
Update on Jim 12/21/09
One down and five to go! Chemo #1 was today and all went well!
Jim had to be at Oncology Associates at 8:15. He was originally scheduled for lab work first, followed by a visit with the doctor and then chemo. Because Jim had just been in last week for the biopsy that included lab work they were able to forego that today. One less "stick"! The visit with Dr. Nabi resulted in some very good news....the biopsy on Jim's right hip showed no cancer in the bone marrow! Needless to say Jim went into his first chemo treatment with a very good frame of mind!
The chemo program that Jim is on is called "R-Chop", (Rituxan, Cytoxan, Adriamycin, Vincristine & Prednisone). He received each med separately. The Rituxan was the one that was administered very slowly over a period of hours. The nurse checked Jim's blood pressure and heart rate every 30 minutes. This med was the one they are most concerned about for reactions -- and there were NONE! The administration of the Rituxan and all the other meds went very well. The actual chemo started around 9:30 and was done by 4:00. Jim says that the day went by very fast and was pretty uneventful. Now we wait....
Nausea is the first concern. We are hoping of course that it won't be an issue. But if so, he has meds on hand to take at the first sign of problems. Then in 7-14 days the potential for hair loss and fatigue will present itself. Once again we are hoping that these side effects will also be non-existent. We are optimistic that there will be little if any problems and that the next several months will go by quickly.
Please continue the prayers for Jim not to feel any ill-effects from the chemo. We really appreciate it!!!!
Wednesday, December 16, 2009
Update on Jim 12/16/09
Jim had to be to Oncology Assoc this morning at 8:15. They did lab work and we met with Dr Nabi before she did the biopsy on his other hip. Dr Nabi informed us that there were some addditional spots of concern that showed up on his PET/CT scan that was done Monday. He has a spot on his back (thorasic area), one in the pubic area and one in a lymph node deep within his abdomen. These results do not change anything in the recommended course of treatment. These tests will provide a baseline from which they will be able to compare future tests so they will know what his progress is. Dr Nabi then proceeded with the biopsy of the bone marrow on his right hip. We hope to have the results of that when we see her at the next appointment. That will be next Monday 12/21 - which is when Jim will have his first chemo treatment. Dr Nabi gave Jim the option to wait till after Christmas for his first chemo but because he is anxious to get the "healing" started he decided not to wait.
On Monday, 12/21 Jim has to be at the Oncology Assoc at 8:15. They will do lab work, he will meet with the doctor and then proceed with his first round of chemo. It was kind of interesting how they described the process. There are five different ingredients in the "recipe" that will be used on Jim. I believe two of them are oral meds. The rest are given separately via IV- they are not a "cocktail" (meaning they are NOT mixed together), but are given separately, in "courses". For the first treatment they will be watching him closely for allergic reactions. It will be administered very slowly so if there are any problems they can stop it. Subsequent treatments should go faster once they've determined he can handle it. This first chemo treatment will take approximately 6 hours, so we are to plan on being there for the entire day. He is to bring a cold sack lunch. They don't want hot food brought in as the smells can be offensive to others receiving treatment. The chemo room has lots of big comfortable recliners in it, blankets galore, DVD players to watch movies and music that you can listen to with earphones. Patients are encouraged to bring books, or anything else that will help the time go by. Everyone is so kind and compassionate there. We feel really good about the care he will be receiving.
We've been warned about possible side effects and things that we need to be watchful for. They have a doctor on call that is accessible through the answering service 24/7, and we were told not to hesitate to call if we have any concerns. The actual side effects of the chemo may not kick in for 7-14 days, as it will take that long to work its way into his system. (Future treatments won't take that long.) I asked if we needed to be concerned about being around family over the holidays and were assured that there should be no problem. Jim was just warned to use proper hygiene habits (i.e., regular hand washing) and to avoid close proximity with anyone not feeling 100%.
Please pray for Jim to not suffer any side effects from his chemo!
You will keep in perfect peace all who trust in you, all whose thoughts are fixed on you!
~ Isaiah 26:3, NLT
Monday, December 14, 2009
Update on Jim 12/14/09
Jim had his PET/CT scan today and it was uneventful. He was there from 12:30 till nearly 3:00. After injecting him with radioactive dye (into his vein) he had to sit still for more then an hour so it could work its way through his system. He admits that he fell asleep for some of that time! They then took him for the scans which were also no big deal. We were back to work by 3:10, with Jim feeling no worse then when we left.
We are hoping to have results of this and Friday's heart test when he sees Doctor Nabi on Wednesday (12/16) for the biopsy. If we hear anything in the meantime I'll be sure to get it posted.
Keep the prayers coming!
"Be anxious for nothing, but in everything by prayer and supplication with thanksgiving let your requests be made known to God. And the peace of God, which surpasses all comprehension, will guard your hearts and your minds in Christ Jesus."
Philippians 4:6-7 (New American Standard Bible)
Sunday, December 13, 2009
Jim's Status Past to Present
Last March we went on a road trip to Kansas City and after we got there Jim started feeling pain in his leg/hip area. We figured he sat wrong or something. He just kind of dealt with it for a couple months.
Jim went to his chiropractor several times over the next few months and there was little if any relief. He asked the doc to order an x-ray just to see if there was anything "wrong in there", and the results showed nothing. That was in June. The chiro gave Jim some exercises to do and he did them, religiously, every day.
In August, Jim went to his family doctor for a physical and talked to him about the discomfort he was experiencing and the doc guessed that it was I.T. Band syndrome since alot of his pain was down the outside of the leg. Routine blood work was done and there was no problems indicated.
Jim called the family doctor in late October and asked to be sent to physical therapy. He went 6 times and followed through with everything the therapist recommended with no relief. The therapist expressed concern that he had made no progress and said she would contact the family doctor with a suggestion that they do an MRI.
The family doctor referred Jim to an orthopedic surgeon for evaluation. Jim saw him on 11/19. The ortho ordered an MRI with the expectation that they would find something torn in his hip.
The MRI was done 12/1 (the day after we returned from Cozumel). On 12/2 Jim was called into the family doctor's office and we were told that a mass had been found. A biopsy was the next step.
A needle biopsy was done Friday 12/4 at St Lukes Hospital. Other then the fact that Jim's hip was extra sore for a few days, it went smoothly.
On Wednesday 12/9 Jim got a call from the family doctor saying that the biopsy had shown cancer. Jim has Diffuse B Cell (non Hodgkins) Lymphoma, stage IV. The doc wanted to get Jim set up with a oncologist right away. He hung up with Jim and then called back 10 minutes later saying that if he could get to Dr Nabi's office by 12:30 that they could get him in. (There was blizzard conditions going on and the office was closing early...as was half the city.) Jim & I rushed out of work and were there with minutes to spare. Dr Nabi was wonderful. She very slowly explained the cancer that Jim has and what to expect in the near future. She also wrote out notes as she explained and then gave us the notes to take home after the appointment. There were three more tests that she wanted done ASAP. A heart scan, a PET/CT scan and another biopsy on the other hip. The one thing she insisted we remember from our visit was that Jim's cancer was CURABLE! He is going to have to work hard to beat it, but it can be beat!
On Friday 12/11 Jim had the heart scan at St Luke's Hospital. It consisted of them taking some blood through an IV, mixing it with some radioactive stuff and then putting it back into his blood. He then was put on a table and had several scans done of his heart from different directions. This test would provide a baseline which they could later use for comparison with future scans to see if there was any changes happening to this heart.
The next test is tomorrow, Monday 12/14 at 12:30. This is the PET/CT scan. Today Jim had to make some modifications to his diet in preparation. For 24 hours prior he was to have no sugar or caffeine. And his meal tonight had to be meat, eggs and/or selected vegetables. High protein, low carb, low sugar. So I chose to make him bacon and eggs. Real bacon, not turkey! He really enjoyed that! He has to have a repeat of this meal tomorrow morning. Normally we just eat something at our desk at work, but tomorrow, if he doesn't eat at home he won't get to eat till after the procedure - which means no food till 4:00 tomorrow afternoon! So we will have breakfast at home prior to going to work. Eggs and bacon, here we come!
Scheduled appointments:
PET/CT scan on Monday, 12/14 at 12:30 p.m. at St Luke's Hospital
Biopsy on Wednesday, 12/16 at 8:30 a.m. at Oncology Associates
Cancer Sucks!
I've not posted since 11/22! I've never gone that long! But time has stood still as great things and sad things have occurred. The great thing was a wonderful trip to Cozumel to watch daughter Rachelle compete in her first Ironman triathlon. She did it in 13 hours and 35 minutes. The days prior were filled with hanging out around the pool drinking fruity drinks, eating wonderful food and soaking in WARM, I repeat WARM weather. It was a lovely time and I'm so thankful that the timing worked out the way it did. (If you want to see pictures from the trip you need to go to either of the girls websites - Rachelle or Becca.)
Anyways, after we got back an onslought of tests were done on hubby Jim and in a matter of a week we found out that he has cancer. There are more tests to be had and then chemo will be started. So, I've decided that I'm going to use my blog as a means of providing information to family and friends who want to know what is going on and how he is doing. Presuming that I am able to do some cooking I may have some food blogging mixed into the picture. You will have to pick and choose what you want to read! My intent is to update every few days.
Anyways, after we got back an onslought of tests were done on hubby Jim and in a matter of a week we found out that he has cancer. There are more tests to be had and then chemo will be started. So, I've decided that I'm going to use my blog as a means of providing information to family and friends who want to know what is going on and how he is doing. Presuming that I am able to do some cooking I may have some food blogging mixed into the picture. You will have to pick and choose what you want to read! My intent is to update every few days.
Sunday, November 22, 2009
Stress Free Dinner
Today my family celebrated Thanksgiving. We are going to be traveling over the actual holiday so we moved our celebration to today. I actually liked having it on a Sunday. I had all of Saturday to do my preparations and today was very stress-free. I know most people won't have this option for this Thanksgiving but my ideas could be used for other meals. Here are some things that I did this weekend that made things go smoothly:
1) I cut up all my veggies that I needed for my various dishes. I needed celery, onions and parsley for my dressing. I also made a roasted vegetable dish that required red and green peppers, red onions, cauliflower and broccoli. My oriental salad needed chopped green onions, so I got them ready also. And since I was already chopping, I cut up my veggies for the vegetable tray.
2) As previously mentioned I was making a roasted vegetable dish and I went ahead and put all my cut up vegetables into the dressing and let them sit overnight. They were ready to put on a pan and bake the next day.
3) I baked my rolls the night before. Usually the big hold up making the rolls is the time to let them raise. (I use Rhodes.) So I decided this year to put them out in the afternoon to raise and I baked them the evening before. They tasted just great - so I'll be doing this again.
4) I start my mashed potatoes several hours before dinner time. I prepare them as normal but I put them in a crockpot to keep them warm till dinner time.
5) This year for the first time I used crockpot liners. Wow. Talk about saving time during clean-up! I liked these alot!
6) I boiled my eggs for the deviled eggs the afternoon before. Then the evening before I cut them and mixed up the filling. I put the filling into a heavy duty zip lock bag and then didn't fill them till a few hours before dinner. Very easy and then throw the bag away.
7) And the biggest time saver of all - I roasted my turkey the day before. I use a roaster but it could be done in the oven just as easily. I let the turkey cool a bit and then refrigerated it. Then on the morning of the dinner I pulled the turkey out and sliced it and put it into the serving dishes. I covered them with foil and then put them back in the refrigerator till about an hour and a half before dinner. I put the turkey back in the oven at 200 degrees. (FYI - I made a 20 pound turkey and split the meat up into two dishes - white and dark meat.)
In case your interested this was our menu (incuding the items that were brought by family members):
Turkey
Mashed potatoes
Party potatoes (brought by sister-in-law Beth)
Crockpot stuffing (already posted on this blog)
Sweet potato souffle
Herbed corn (to be blogged later)
Green bean casserole (brought by sister Patty)
Vegetable casserole (brought by sister-in-law Beth)
Roasted vegetables (to be blogged later)
Oriental salad
Apple salad (brought by sister Patty)
Grape salad
Deviled eggs (to be blogged later)
Buns (Rhodes)
Veggies, dip, pickles, olives, cranberry sauce, cottage cheese
Apple dumplings (brought by step mom Laurie)
Cherry pie (brought by mom-in-law)
Pecan/chocolate pie (brought by sister-in-law Beth)
Pumpkin pie dessert (to be blogged later)
We had 23 eaters but could have fed many more! Extras mean that food goes home with people and that is a good thing!
I'll be posting some of menu items that I made at a later time. So stay tuned!
Saturday, November 14, 2009
Cinnamon Fruit Biscuits
 This past week we had our monthly potluck at work. Since hubby and I work together we have a period of months that we have to take 2 items. This month I was responsible for the breakfast and hubby was responsible for the entree. I didn't get any pics of the meatloaf that I made but I'm going to share that recipe also because it is very much a winner! I made two things for our breakfast, one sweet and one savory. Both were super easy, new recipes that I got out of Taste of Home's 5-Ingredient Cookbook. The first one that I'm going to share is the Cinnamon Fruit Biscuits. If you didn't want to spend alot of money but wanted to take something that will go over big - - this would be the ticket! This recipe definitely goes into the "keeper" recipe file!
Cinnamon Fruit Biscuits
(from Taste of Home's 5-Ingredient Cookbook)
1/2 cup sugar
1/2 cup ground cinnamon
1 tube (12 oz) refrigerated buttermilk biscuits, separated into 10 biscuits
1/4 cup butter, melted
10 tsp strawberry preserves
In a small bowl, combine the sugar and cinnamon. Dip top and sides of biscuits in butter, then in cinnamon-sugar. Place on ungreased baking sheets. With the end of a wooden spoon handle, make a deep indentation in the center of each biscuit; fill with 1 teaspoon of preserves.
Bake at 375 degrees for 15-18 minutes or until golden brown. Cool for 15 minutes before serving (preserves will be hot). Yield: 10 servings
 This is a picture of the biscuits before they went into the oven. Instead of using a wooden spoon handle I used the following kitchen tool. It made the indentation larger. (I used the smaller of the two ends.)
 Here is a pic after they came out of the oven. They look like little kolaches don't they? But they definitely don't taste like kolaches. Much sweeter due to the sugar cinnamon coating. Feel free to change up the preserves based on personal taste.
 These went over very well. I quadrupled the recipe so the guys at work could have a couple apiece. They taste best the first day, but are still eatable on the day after!
Cheese and Sausage Muffins
 Personally, I don't each cheese so I can't even say that I tried these. But everyone that did said they were good. It probably would add to the flavor to add some grated cheddar cheese just to add to the cheesey taste. This recipe came together very quickly once you have the sausage cooked up. Mine weren't served warm because I made them the night before, but I'm sure they would be at their peak taste if served right out of the oven.
Cheese and Sausage Muffins
(Taste of Home's 5-Ingredient Cookbook)
1 pound bulk hot pork sausage
1 can (10-3/4 oz) condensed cheddar cheese soup, undiluted
1/2 cup milk
2 to 3 tsp rubbed sage
3 cups biscuit/baking mix
PLUS (my addition) - 1/2 to 1 cup of grated cheddar cheese
In a skilled over medium heat, cook sausage until no longer pink; drain. In a bowl, combine soup, milk, sage and sausage. Stir in the biscuit mix just until moistened.
Fill greased miniature or regular muffin cups two-thirds full. Bake at 400 degrees for 15-20 minutes or until a toothpick inserted near the center comes out clean. Yield: 4 dozen mini-muffins or 2 dozen regular muffins.
TSR version of Boston Market Meatloaf
I've been making meatloaf for many years. In the early years I relied on the Heinz 57 sauce recipe and was very happy with it. Then in 2001 I found the following recipe. It uses no eggs or fillers (such as crackers or oatmeal). It moved into the family favorite category very quickly and now this is the recipe I use for meatloaf. The recipe came from the Top Secret Recipes (TSR) website. In the early days, this was a free website, which is not true anymore. It still provides "clones" of many popular food items from restaurants that we are all familiar with. This meatloaf recipe is supposed to be a clone of what they serve at Boston Market. I ate at a Boston Market restaurant years ago when my eldest was going to school at Iowa State in Ames. But they are no longer there and I haven't seen one of these restaurants since. I know they still exist just not in our regional area. So how close this recipe is to what they serve I can't tell you. I just know that it is VERY good!
I served this meatloaf at our company's monthly potluck. I mixed it up the night before and then took it to work and baked it there. As a result, no pictures. (Pictures of raw meat didn't sound appetizing.) I was asked to share the recipe which always tells me that it went over well.
TSR version of Boston Market Meatloaf
1 cup tomato sauce
1-1/2 TBSP Kraft original barbeque sauce (I use Cookies - no high fructose)
1 TBSP granulated sugar
1-1/2 pounds ground sirloin (10% fat)
6 TBSP all-purpose flour
3/4 tsp salt
1/2 tsp onion powder
1/4 tsp ground black pepper
dash garlic powder
Preheat oven to 400 degrees.
Combine the tomato sauce, barbecue sauce and sugar in a small saucepan over medium heat. Heat the mixture until it starts to bubble, stirring often, then remove it from the heat.
In a large bowl, add all but 2 TBSP of the tomato sauce to the meat. Use a large wooden spoon or your hands to work the sauce into the meat until it is very well combined.
Combine the remaining ingredients with the ground sirloin--flour, salt, onion powder and ground pepper. Use the wooden spoon or your hands to work the spices and flour into the meat.
Load the meat into a loaf pan (preferably a meatloaf pan with two sections which allows the fat to drain, but if you don't have one of those a regular loaf pan will work). Wrap foil over thepan and place it into the oven for 30 minutes.
After 30 minutes, take the meatloaf from the oven, remove the foil and, if you aren't using a meatloaf pan, drain the fat.
Using a knife, slice the meatloaf all the way through into 8 slices while it is still in the pan. This will help to cook the center of the meatloaf. Pour the remaining 2 TBSP of sauce over the top of the meatloaf, n a stream down the center. Don't spread the sauce.
Place the meatloaf back into the oven, uncovered, for 25-30 minutes or until it is done. Remove and allow it to cool for a few minutes before serving.
My notes:
I like to use fresh onion (1 small) and garlic (2-3 cloves), minced instead of the powder. I don't have a meatloaf pan, so I normally double the recipe and use a 9X13 pan.
Sunday, November 8, 2009
Crockpot Dressing, Crustless Pumpkin Pie, Butter Horn Rolls
 I've been cooking all day! Our camping club had our annual Thanksgiving dinner together and eating was a big part of the agenda. (Although we did conduct a short meeting!). I had signed up to make a turkey (which I did in the roaster) and dressing (which I made in the crockpot). I started both of them this a.m. After an easy lunch (of Subway) I started itching to make some additional food items to take to the dinner. One of our family favorites is crustless pumpkin pie. The majority of the carbs in pumpkin pie is in the crust so if we cut the crust out of the picture then we can enjoy with less guilt! I found this recipe on the Eagle Brand Sweetened Condensed Milk can back in 2005 and have made it year round ever since! But that wasn't enough. I figured there might not be many rolls at the potluck, so I started hunting for a yeast recipe that wouldn't take hours and hours. I found one that I was able to throw together very easily - plus they were delicious. I love it when a new recipe works out. I'm going to share recipes for the dressing, pumpkin pie and the rolls.
Crock-Pot Dressing
1 cup butter
12 to 13 cups bread cubes (2 X 14 oz pkgs)
2 cups chopped celery
2 cups chopped onion
¼ cup parsley
2 beaten eggs
4 cups chicken broth
1 tsp poultry seasoning
1 ½ tsp salt
1 ½ tsp sage
1 tsp thyme
½ tsp pepper
½ tsp marjoram
Mix all ingredients together in crock pot. Cook on high for 45 minutes, then turn to low and cook 4 to 6 hours.
Variation: May add cut-up turkey or chicken, if desired.
Original recipe called for 1 (8 oz) can drained mushrooms.

Perfect “Crustless” Pumpkin Pie
1 (15 oz) can pumpkin (2 cups)
1 (14 oz) can sweetened condensed milk (I used no fat)
2 eggs
1 tsp ground cinnamon
½ tsp ground ginger
½ tsp ground nutmeg
½ tsp salt
Preheat oven to 425 degrees F. With wire whisk or mixer, beat all ingredients. Pour into a pie pan (greased). Bake 15 minutes. Reduce oven heat to 350 degrees F. Continue baking 35-40 minutes or until knife inserted 1 inch from edge comes out clean. Cool. Garnish as desired. Store covered in refrigerator.
The original recipe called for it to be put into an unbaked 9-inch pie crust.

Butter Horn Rolls
(from America’s Best Lost Recipes Cookbook)
Makes 24 rolls
12 tsps (1 ½ sticks) unsalted butter – DIVIDED
1 cup warm milk (110 degrees)
½ cup sugar
3 large eggs
4 ½ - 5 cups all-purpose flour (I substituted one cup of regular for whole wheat flour)
1 pkg rapid-rise or instant yeast
1 ½ tsp salt
1. Lightly grease a large bowl with cooking spray. Melt 8 tbsp of the butter in a small saucepan over medium heat; let cool. Mix the melted butter, milk, sugar and eggs in a large measuring cup. Mix 4 ½ cups flour, the yeast, and salt together in the bowl of a standing mixer fitted with the dough hook. With the mixer on low, add the milk mixture. After the dough comes together, increase the speed to medium and mix until shiny and smooth, 4 to 6 minutes. (If the dough is sticky after 3 minutes, add the remaining ½ cup flour, 2 tbsp at a time.) Turn the dough out onto a heavily floured work surface, shape into a ball, and place in the greased bowl. Cover the bowl with plastic wrap and let rest in a warm place until the dough is doubled in size, about 1 hour.


2. Spray two baking sheets with cooking spray. Melt the remaining 4 tbsp butter over medium heat; let cool. Divide the dough into three equal pieces. Working on a lightly floured work surface, roll each piece of dough into a 10-inch circle; brush with melted butter. Using a knife or pizza cutter, cut each circle into eight equal wedges. Starting at the wide end, roll up the dough, ending with the pointed tip on the bottom. Place 2 inches apart on the prepared baking sheets and curl in the ends slightly to form a crescent shape. Cover the rolls with plastic wrap coated with cooking spray and let rise until the rolls are doubled in size, about 45 minutes.

3. Adjust two oven racks to the upper-middle and lower-middle positions and heat the oven to 325 degrees. Bake the rolls until golden brown, 25 to 30 minutes, switching and rotating the baking sheets halfway through baking. Serve hot or warm.

Everything turned out wonderful and tasted just great! The new recipe was the rolls and they will now move into the "keeper" recipe file.
Sunday, November 1, 2009
Banana Nut Cake

I had three very ripe bananas sitting on my counter that were calling me to use them in something...anything! I've been making lots of banana bread this last year so I decided it would be a banana cake this time. I wanted to put it together quickly so I turned to one of my cookbooks that starts with a cake mix. I love these recipes! They come together quickly and I've yet to be disappointed in one. I would have loved to use black walnuts in it as the recipe calls out, but my hubby is not fond of black walnuts - so I went with the English variety. My other change was that I did not make the frosting that was recommended. I was trying to get this together quickly and I had some frosting in my freezer that was leftover from a baking frenzy several months back. It was a brown sugar frosting. I thawed it out, warmed it up and spread it on the warm cake. It was delicious.
Banana Nut Cake
(from Quick Fixes with Mixes)
1 (18.25 oz) yellow cake mix
3 eggs
1/3 cup vegetable oil
1 cup milk
3 tbsp sugar (I did not use)
1 cup mashed ripe bananas (about 2 ½ medium bananas)
1 cup chopped black walnuts (I used English walnuts)
Preheat oven to 350 degrees. In a large bowl, combine cake mix, eggs, oil, milk and sugar. Beat on low speed to blend, and then beat on medium for 2 minutes. Add bananas and beat for 1 more minute on medium. Stir in walnuts. Pour batter into greased and floured 9 X 13 baking pan. Bake for 30 to 35 minutes, or until cake tester comes out clean. Let cake cool until just warm to touch, and spoon Dark Caramel Glaze over.
Dark Caramel Glaze
1 cup packed dark brown sugar
1/3 cup half-and-half
¼ cup (1/2 stick) butter or margarine
1 tsp vanilla
In medium saucepan, melt brown sugar, half-and-half, and butter over medium heat and bring to a boil. Boil for 6 minutes, stirring constantly until mixture is thickened. Remove from heat; beat in vanilla. Spoon over warm cake as evenly as possible. To ensure adequate coverage, poke holes in top of cake with a toothpick or bamboo skewer before spooning glaze over.
The glaze will have the consistency of thick syrup.
Sunday, October 25, 2009
Mini Pumpkin Tarts
 "Work in progress" - I used a ziplok gallon storage bag with the end cut off to fill the tarts.
This past weekend I attended the annual Ladies Fall Brunch at our church. The church asked ladies to host and decorate a table. I had decided to go with a new theme on my table this year - Thanksgiving! I found a really cute Thanksgiving tablecloth at a second hand store and built the table decorations around it. It seemed only appropriate that I would take a dish that had pumpkin in it - so I selected Mini Pumpkin Tarts. This is one of the easiest desserts to put together. Because you don't want the tart shells to get soggy with the filling I couldn't make these the night before. It was super easy to throw together just before leaving for the brunch. I have a picture of the table at the end of this post - check it out!
Mini Pumpkin Tarts
3 pkgs (15 tarts each) prebaked frozen mini pastry shells
1 (15 oz) can pumpkin
2 cups (plus extra for garnish) frozen whipped topping, thawed
1 tsp (plus extra for garnish) pumpkin pie spice
1 (3.4 oz) pkg cheesecake-flavor instant pudding and pie filling (I use vanilla flavor)
Mint leaves (for garnish if desired)
First, remove the shells from the freezer and let them thaw at room temperature for 15 minutes.
Meanwhile, combine the pumpkin, whipped topping, and pumpkin pie spice in a medium bowl, whisking until smooth. Add the pudding mix and whisk until smooth and thick.
Spoon abut 1 tablespoon of the filling into each of the shells (you can also pipe the filling with a pastry bag or a plastic sandwich bag with one corner snipped off), then top the tarts with whipped topping, a sprinkling of the pumpkin pie spice and a mint leaf, if you like.
Makes 45 tarts.
NOTE: Refrigerate any leftovers - but be prepared, the tart shells will get soft the longer they sit with filling in them!

These are the tart shells that I used.
 The mixture becomes very thick once you add in the pudding mixture.
Here are a couple pictures from the brunch that I made these for. Thanks Jennifer for taking the pics and sharing them with me!


Pumpkin Cake

Can you handle another pumpkin recipe? I can't get enough this time of year. My mother made this recipe many times over the years. She has been gone almost 6 years now but I still think of her everytime I make it. It is so moist, easy to make and tasty. I've shared this recipe with many people. If you are a pumpkin lover like I am, you'll love this recipe.
Pumpkin Cake
Cake Layer
1 spice cake mix
1 can Libby’s pumpkin pie mix (NOT puree)
3 eggs
Mix the above ingredients until combined.
Mix the following and add to the above mixture:
½ cup cold water
2 tsp baking soda
Pour into a 9 X 13 pan and bake at 350 degrees for 45-50 minutes. Allow to cool before putting topping on.
Topping
8 oz whipped topping
½ tsp vanilla
1/3 cup brown sugar
Whip together and spread on cake. Cake must be refrigerated.
Make sure you use the pumpkin pie MIX, not puree! They are NOT the same!

This is everything in the mixing bowl, before beating. Pumpkin, cake mix and beaten eggs.
 Here is the "before" baking picture.
 ...and this is the "after picture!
Then you frost and eat!
Thursday, October 22, 2009
Doggie Treats

This is the "little" man of our house - his name is Tito. I've been making doggie treats for him for several years and he never grows tired of them. You would think they were something new and great everytime he gets one. He gobbles them up. Because of Tito's size, I make them pretty small and even then he only gets a small part as his "treat". So they go a long way.
Tito's Favorite Doggie Treat
Ingredients
2 cups whole wheat flour
1 Tbsp baking powder
1 cup peanut butter
1 cup milk
Preheat oven to 375 degrees. In bowl, combine flour and baking powder. In another bowl mix peanut butter and milk. Then add dry ingredients to wet ones and mix well. Place dough on a lightly floured surface and knead. Roll dough to 1/4" thickness and use a cookie cutter to cut out shapes. Bake for 20 minutes* on a greased baking sheet until lightly brown. Cool on rack. Caution -- these can burn easily!
Note - *if you make treats as small as I do - the time cuts back to around 13 minutes!

This is what the finished treat looks like.

This is the cookie cutter set I use. The littles four sided flower one on the far right is the one I use.
Wednesday, October 21, 2009
Broccoli Grape Salad

I have a whole collection of family favorite recipes that I'm slowly trying to include on this blog. This particular recipe could have easily NOT been included in this collection. Broccoli and grapes in the same salad did not appeal to me at all. But one of my co-workers had made it up and insisted that I try one bite. Wow - this was great! The sweet of the grapes, the crunchiness of the broccoli, the savory flavor of the bacon. Mmmmm! I have now made this recipe so many times that I could not even begin to count. I just love it! And when I'm introducing it to anyone new, I now insist they try "one bite"! There have been many converts. If you have a vegetarian in the house, as I do, simply hold off on adding the crumbled bacon until after you scoop some out. This is a great side dish for your family gatherings. It is now a "must have" for our Thanksgiving table.

All the cut up ingredients, awaiting the dressing.
Broccoli Grape Salad
4 C. Broccli cut up
1 1/2 C. Green Grapes cut in half
1 1/2 C. Red Grapes cut in half
8 slices cooked bacon crumbled
1/2 C. Green Onions
1 C. Celery
1 can chopped smoke house smoked almonds (these can be pricey so I've used regular sliced or slivered almonds instead)
Dressing
1 C. Hellmans Mayo (I use light Hellmans)
1/2 C. Sugar (I've used Splenda with no obvious difference)
Can be prepared in advance, but put don't put the dressing on till right before serving.
Sunday, October 11, 2009
Especially for You, race against breast cancer
 Becca, Patty & myself
On Sunday 10/11/09, I ran my 4th race EVER! This was my third 5K and the coldest conditions I've ever put myself into, by choice. There were thousands of people there, easily one of the biggest races in our area. There were 852 finishers in the 5K Run, 3947 finishers in the 5K Walk and 1422 finishers in the 1 Mile Walk. There were ALOT of people there! I'm presuming that if the weather had been better the turnout would have been twice as many.
The temp was below freezing. But all of us (sister Patty, daughter Becca and myself) had gotten great advice from my eldest daughter Rachelle about how to dress for the temperatures. She had advised layers, keeping in mind where you primarily get cold, i.e, arms or core. Patty and Becca both dressed with a long sleeve shirt and a vest. I double layered my arms and regretted it. I had a long sports bra on, a long sleeve shirt and a light jacket. We all wore running pants, warm socks and gloves. The best piece advice of all was the warm-up instructions. Rachelle had told us to jog around for 10-15 minutes. Nothing challenging, but man did it do the job! When it was time to get lined up for the start of the race my core was warmed up and I was able to stand there and not shiver as many around us were!
The race went well, it was pretty straight and smooth through city streets. My stamina is definitely improving and I tried to push myself as I wanted a new PR. And I got one! My time was 29:51 and my pace was 9:36. I broke the 10 minute pace! YEAH! I ended up finishing 11th in my age group (out of 26 women 50-54). I looked at the other women in my age group and some of them are VERY fast! The woman who won my age group ran a 24:04 time, 7:45 pace. WOW! That is even faster then Becca. How can that be? Needless to say there is lots of room for improvement. And when I see other women my age (and older) running that fast that tells me that I have capabilities that I can't even fathom at this time. The future will be interesting!
Next race? I'm thinking that I will do the Turkey Trot 4K/10K in Marion on November 21st. That is the Saturday before Thanksgiving. The Saturday before we leave for Cozumel to support Rachelle in her first Ironman event. Could be a busy weekend....I've yet to decide...
Sunday, October 4, 2009
Fruity Baked Oatmeal
 I came across this recipe in the following cookbook in November of 2008 and have made it many times ever since. It is one of those recipes that you can change it up very easily with different fruits. It is great warmed up or room temperature. We eat it as a breakfast "on the go" type of meal. Definitely one of our family favorites. I like to mix everything up and put it in the fridge over night and bake it in the morning, so it is warm. This recipe will be used by our family for years to come!
Here is a picture of the cookbook I got it out of. It has become one of my favorites. It has many recipes that I've already made and liked and many more that I'm itching to get started on!
 Fruity Baked Oatmeal
source: Taste of Home, simple & delicious cookbook
2 cups quick-cooking oats
1 cup packed brown sugar
2 tsp baking powder
1 tsp salt
1/2 tsp ground cinnamon
2 eggs, slightly beaten
1 cup milk
1/2 cup butter, melted
3/4 cup chopped peeled tart apple
1/3c cup fresh or frozen peaches
1/3 cup fresh or frozen blueberries
Additional milk, optional
In a large bowl, combine the oats, brown sugar, baking powder, salt and cinnamon. Combine the eggs, milk and butter; add to the dry ingredients. Stir in the apple, peaches and blueberries.
Pour into an 8-in. square baking dish coated with nonstick cooking spray. Bake, uncovered, at 350 degrees F for 35-40 minutes or until a knife inserted near the center comes out clean. Cut into squares. Serve with milk if desired. Yield: 9 servings
Editor's note: If using frozen blueberries, do not thaw before adding to batter
My comments: I have added dried cranberries, mashed bananas, chopped nuts, and applesauce (instead of apples). You really have lots of room for variation. You should have approximately 1-1/2 to 1-3/4 cup of add-ins, regardless of what they are.
Sunday, September 27, 2009
Blueberry Oat Bars

If you are looking for an alternative to the store bought breakfast bars this is the recipe for you. When you make it yourself you know exactly what you are getting. This bar recipe is one that has great taste and is nutritious. I've made it many, many times and it has become a family favorite!
Blueberry Oat Bars
Source: Hy-Vee Test Kitchen (Hy-Vee.com)
Ingredients:
2 cups uncooked quick oats
1/2 cup raw pumpkin seeds (pepitas)
1 cup sliced almonds
9 Tbsp wheat germ
1/2 cup honey
2 Tbsp Spenda brown sugar blend for baking
2 Tbsp salted butter
2 tsp vanilla
1 (4 oz) package of dried blueberries
Combine the oats, pumpkin seeds, almonds and wheat germ on a large baking sheet. Bake at 350 degrees F for 10 minutes, stirring occasionally, until oats and almonds are light brown.
Meanwhile, combine the honey, Splenda brown sugar blend, butter and vanilla in a medium saucepan. Cook over medium heat until butter is melted. Stir in oat mixture and blueberries. Press mixture firmlly into an 8X8 inch baking dish sprayed with non-stick spray.
Bake at 300 degrees F for 25 minutes. Allow bars to cook before removing from pan. Cut into squares and store in an airtight container for up to a week.
Serves 15 (1 bar each)
Nutrition information (per serving): Calories: 210; Carbs: 29 g; Cholestrol: 5 mg; Dietary Fiber: 5 g; Fat: 8 g; Protein: 6 g; Sat Fat: 1.5 g; Sodum: 15 mg; Sugar: 15 g; Trans Fat: 0 g
My comments:
This is another recipe that you can easily change up by using a variety of dried fruits, cranberries, cherries, you name it! Just do not use any frozen berries! I did it once and it added to much moisture to the bars - they did not hold a shape at all. In fact you practically had to eat them with a spoon they were so crumbly. Tasty...but crumbly!
This picture is the toasting of the oats, pumpkin seeds, almonds and wheat germ.

This picture is of the honey, brown sugar, butter and vanilla being heated in the saucepan.
 Enjoy!
Indian Summer Distance Classic - 4 mile run
 My third race of the season was held at Lake MacBride State Park on 9/26/09. It was my first trail run and my first four mile distance. The first two were 5K, so I had set the bar a little higher! And miracle among miracles, I did not only finish, but I placed. First place in my W50-59 age category. When they called me up for the medal I was in a state of disbelief! I turned to all who were spectating and announced, "First 4 miles EVER, first season running!". Can you tell I was a little proud?
 FYI - there were four women in my age category. My time was 40:52, my pace was 10:13. The hills were unbelievable! There were several hills and the course was quite challenging. But I finished and I did well!
My running partners, daughter Becca and sister Patty also competed. Each is in different age categories and each is much faster then me. I was the only one that walked away with a medal but each of them had set new best times for themselves.
I find it interesting that as I've trained this year (starting in May) and slowly built myself up into this running machine (NOT), I've learned some things about myself. First, I am capable of doing things that are bigger and greater then when I was younger. I ran when I was in the Air Force, but 2 miles had been my top distance. Here I am 25 years later surpassing that distance. Does this mean I am in better physical shape then I was 25 years ago? Maybe. Secondly, I've learned that my daughters can teach me a few things. They are very smart and very inspiring. They both work so hard at what they do, professionally and athletically. They are unrelenting in their quest for improvement. Wanting to be faster and more efficient... Finally, I have learned to consistently challenge myself. I don't want to become complacent. There is no telling where I will go from here......
The next race is on October 11th, the Especially for You race against breast cancer.
Sunday, September 20, 2009
Fresh Apple Brownies
 Apples, apples everywhere! My boss, Margaret has apple trees in her yard. They aren't pretty to look at, but they bake up great. Margaret has been busy making pies and bars and freezing them for future enjoyment. She sent a box of apples home with me so I knew I had to get busy before they go bad. I found this recipe in my collection. It is handwritten and I have no idea where I got it from, so I can't give anyone credit. But it uses a fair amount of apples (2 - 2-1/2 cups, chopped) and it tastes very good. The apple taste shines through! And since I love nuts in everything, I was generous when it came time to add them.
 This picture is "before" the batter went in the oven.
 This one is when it came out.
Fresh Apple Brownies
(source unknown)
Cream together:
1/3 cup shortening
1 cup sugar
1 egg
3 Tbsp cream or milk
Mix dry ingredients together:
3/4 tsp baking soda
1/4 tsp nutmeg
1/2 tsp cinnamon
1 cup flour
Add dry ingredients to creamed mixture. Mix together.
Add:
2 - 2-1/2 cups finely chopped apples
1/4 cup chopped nuts (optional)
Spread in a greased 9X13 pan. Bake @ 375 deg for 30-35 minutes or till lightly browned. Cool completely before cutting.
Tuesday, September 15, 2009
New find - Kim's Magic Pop
 I love finding new and interesting foods! We were in Dallas Texas for a wedding recently and our friends introduced us to a tasty new treat! They are called Kims Magic Pops. They are a multigrain snack cake and only 15 calories each! They can be topped with almost anything, sweet or savory. We tried them with some syrup drizzled on them and they were delicious! The question will be if we can find them here in Iowa. Our friend Randy found them at Central Market in Dallas. They had the machine set up there in the store, making them fresh right before the customer's eyes. If you see these offered at one of your local stores - be sure to purchase some! You won't be sorry!
New info - my friend Jody in Texas tried them with peanut butter and honey and said it was delicious!
Sunday, September 13, 2009
Crock-pot Turkey Breast
 This recipe is one that I go back to over and over again. There is very little prep and the results are always wonderful. I can guarantee that you'll put this recipe in your favorite recipe file after you try it the first time!
Crock-pot Turkey Breast
source: Cedar Rapids Gazette, Desperation Dinners column
1 turkey breast (6 to 6-1/2 pounds), frozen (see note)
2 tsp vegetable oil
Salt and pepper, to taste
1 medium onion
4 garlic cloves
Rinse the turkey and pat it dry with paper towels. Rub the turkey all over with oil. Sprinkle the breast lightly with salt and pepper to personal preference.
Place the breast, meaty side up, into a 5-quart slow cooker.
Peel the onion, cut it into quarters, and place the pieces around the edges of the pot. Peel the garlic cloves and place them around the sides of the cooker. Cover the cooker and cook the breast on low for 9 hours, or until the meat thermometer registers 170 degrees. Remove the breast from the cooker and let the bird stand at least 10 minutes before slicing. (The internal temperature will continue to rise while the bird is standing.) Discard the vegetables in the cooker. Serve the breast sliced, preferably without skin.
Note: If the turkey breast is not frozen, check for doneness (170 degrees) with a meat thermometer after 7-1/2 to 8 hours of cooking on low. Be sure to wash your hands well with soap and water immediately after handling raw poultry. Wash sink and counter surfaces the meat touches with soap and hot water.
If you do not use the entire turkey in the meal you can refrigerate, covered for 24 hours before chopping the meat and freezing. Place the meat in a freezer-weight plastic bag and freeze for up to 2 weeks.
Nutrition facts per serving (without skin): 326 calories (8 percent from fat), 3 g fat (1 g saturated), 194 mg cholestrol, 70 g protein, 0 g carbohydrates, 0 g dieteary fiber, 122 mfg sodium.
Comments from me:
I like to have this turkey breast for my Sunday dinner, but I don't want to get up at 3:00 a.m. to put it in the crock-pot. What I've done the last several years is cook it overnight. I wait as late as possible (10 - 11:00 p.m.) to start the crock-pot. When I get up the next morning it is done. You then have two choices (I've done both), either keep it warm in the oven (put the whole crock pot in the oven) at 150 degree F; or let it cool, slice it and warm only what you need for the meal.
I don't always have an onion in the house, so I've used celery as my veggie on the bottom and it works. Make sure you use the garlic though - I oftentimes use more then 4 cloves. I also season with garlic pepper (my favorite seasoning).

It always amazes me that you don't need to add any water to the crock-pot if you are cooking the frozen turkey. You will get plenty of broth to make gravy!
Saturday, September 12, 2009
Pistachio Brownies
 You look at the pictures and think, "those don't look like pistachios"! You are right! The recipe called for them but with an abundance of pecans in my freezer I'm not going to go out and buy pistachios. So, if you want to make this recipe true to its name, you can go do that! These brownies are very good...very chocolately.
Pistachio Brownies
source: Prevention Magazine, Quick & Healthy Recipes (insert in their 10/09 magazine)
1/2 cup cake flour
1/2 cup unsweetened cocoa powder
1/4 tsp baking powder
1/4 tsp salt
1 large egg
2 large egg whites
3/4 cup sugar
1/2 cup vegetable oil
1-1/2 tsp vanilla extract
2 Tbsp chopped pistachios (or nuts of choice)
Preheat oven to 350 deg F. Coat 8"X8" baking pan with cooking spray
Sift together flour, cocoa, baking powder and salt in medium bowl. In large bowl, whisk egg and egg whites till frothy. Whisk in sugar, oil, and vanilla extract until smooth.
Fold flour mixture gradually into liquid mixture until just blended. Pour into prepared pan. Sprinkle with nuts.
Bake 20 to 25 minutes, or until wooden pick inserted in center comes out with moist crumbs. Cool in pan on rack, then cut into 12 squares.
Nutritional info per serving: 170 cal, 2 g pro, 18 g carb, 1 g fiber, 2 g sat fat 18 mg chol, 74 mg sodium
Monday, September 7, 2009
Fruit Salsa with Cinnamon Chips
 A few years ago I found this recipe for fruit salsa and chips. I will admit that there is a little bit of work involved, but it is soooo worth it! The mixture of fruits is just perfect and everyone who tries it falls in love! The chips are so good that they could be used in other sweet dips. I could see them used with a chocolate chip cheese ball. (I’ll share that another time!) The chips themselves are pretty easy and if you have some tortillas sitting around, needing to be used this would be the perfect recipe. You could probably even use some sort of savory spices and just eat them by themselves. (Sounds like I may need to do some experimenting in the future…)
I had a party to go to, hosted by my good friend Jennifer. The party theme was, “Dippy Blondes”, and we were to all bring a dip to share. Now I’m not blonde, and I’m certainly not “dippy”, but I loved the idea of a themed party bringing a bunch of gals together, to do two of my favorite things: eat and talk! We had a ton of fun and I won’t be surprised if Jennifer finds other interesting themes to bring us together again in the near future! This fruit salsa and chips recipe was my contribution to the party and it was very well received!
Here are some pictures taken while making this recipe. First up was cutting up the fruits, which is really the time intensive part of this whole process. The recipe didn’t say to cut up the strawberries, but I did – into small pieces. And the raspberries I sorta smashed.
 Next, mix in the sugars and fruit preserves…and you are done. It just needs to chill!
On to the chips. I used whole wheat tortillas in this recipe. I cut them up into wedges using a pizza cutter and then sprayed them with the butter flavored cooking spray. Then you sprinkle them with the cinnamon /sugar mixture and spray them again. (I do NOT use 2 cups worth like the recipe calls for.)
 Put them on a baking sheet (I like to use the pizza pan so they get crispy on both sides) and bake.
After baking them and allowing them to cool completely, you can store them in a plastic ziploc bag or container. They'll stay fresh for several days!

Here is the recipe:
Here is the recipe:
Fruit Salsa and Cinnamon Chips
From Allrecipes.com – named for Annie
Ingredients
2 kiwis, peeled and diced
2 Golden Delicious applies – peeled, cored and diced
8 oz raspberries
1 pound strawberries
2 tbsp white sugar
1 tbsp brown sugar
3 tbsp fruit preserves, any flavor
10 (10 inch) four tortillas
butter flavored cooking spray
2 cups cinnamon sugar ( I never use this much)
Directions
In a large bowl, thoroughly mix kiwis, apples, raspberries, strawberries, white sugar, brown sugar and fruit preserves. Cover and chill in the refrigerator for at least 15 minutes.
Preheat oven to 350 degrees F.
Coat one side of each flour tortilla with butter flavored cooking spray. Sprinkle with desired amount of cinnamon sugar. Spray again with cooking spray. Cut into wedges (a pizza cutter works great) and arrange in a single layer on a large baking sheet.
Bake in preheated oven 8 to 10 minutes. Repeat with additional tortilla wedges till all have been baked. Allow to cool approximately 15 minutes. Serve with chilled fruit and spice mixture.
Friday, August 14, 2009
Refrigerator Kolaches
 (from top right going clockwise: apricot, poppyseed, strawberry, blueberry, cherry and prune)
Kolaches were my first attempt at working with yeast. When my Mother passed away in 2003, it occurred to me that there would be no one left in our family to make kolaches. I wasn't particularly worried about the recipe because I made it a personal mission to find one that would work for me. It was more important that the actual "act" of making kolaches lived on. Well, I tried several different recipes but because of my schedule, I didn't have hours upon hours to make them from start to finish. I happened upon the following recipe which allowed me to make my dough the night before and let them raise overnight in the fridge. The next day I could scoop, raise, fill and bake. This was perfect for me. I've made them MANY times! My hubby says they taste great even a couple days after being baked. So that he can enjoy them over a period of time, I normally will bag them up, with a couple of them in each sandwich bag, put them into a freezer bag and then pull them out as desired for breakfast.

 This is the way the dough looks the night before. You cover the bowl with plastic wrap and put it in the fridge. The below picture is what it looks like in the a.m.!


Refrigerator Kolaches
From “Recipes from the Heart" – Salem United Methodist Church, C.R., IA – Pat C.
Ingredients
1 cup warm water (105 – 115 deg)
3 pkgs dry yeast (3 tbsp bulk)
2 eggs (well beaten)
1 cup sugar
½ cup Crisco (melted)
2 tsp salt
7-8 cups flour
1 cup mashed potatoes (nothing added)
1 cup potato water
Directions
Dissolve yeast in warm water. Mix sugar, eggs, Crisco and salt. Add yeast and 4 cups flour. Beat in potatoes and potato water. Beat for 5 minutes. Work in the rest of the flour; knead well and placed in a well-greased bowl. Brush top with melted butter and refrigerate overnight. In the morning, shape the dough in walnut size balls and place on a well greased baking sheet to rise. After double in size, flatten in the center and fill with your favorite filling and let rise again. Bake at 400 deg until brown, 18-20 minutes.
My comments:
1) If I don’t have mashed potatoes handy I’ve used instant potatoes with good results.
2) I’ve used evaporated milk for the potato water.
3) Make sure the warm water is NOT too hot. If it is you will kill the yeast and have to start over.
4) This dough is equally good for cinnamon rolls!
5) Don't use airbake pans with these. They don't brown on the bottom.
6) Using a medium scoop I get 5-6 dozen kolaches per batch.
7) Here is how many I get from each can of fruit: apricot (19), strawberry pie filling (22), poppyseed (19), cherry pie filling (26), blueberry pie filling (30), prune (17).
8) If using pie filling - I always strain the "goo" out of the fruit. You can then add back in what you need to get it to the desired consistency.
My shortcuts
1) Use your electric mixer with the bread hook to do the work. I’ve used my Kitchen Aid mixer ever since I started making these 6 years ago!
2) Use your cookie scoop for scooping the dough. The size is uniform and it is much quicker then rolling each one in your hands.
My shortcuts
1) Use your electric mixer with the bread hook to do the work. I’ve used my Kitchen Aid mixer ever since I started making these 6 years ago!
2) Use your cookie scoop for scooping the dough. The size is uniform and it is much quicker then rolling each one in your hands.
This is the way the dough looks the night before. You cover the bowl with plastic wrap and put it in the fridge. The below picture is what it looks like in the a.m.! I then use a medium cookie scoop to form the balls. I have three sizes which I've gotten from Pampered Chef. For your info the large scoop is equal to 3 TBSP, the medium scoop is equal to 2 TBSP and the small scoop is equal to 1 TBSP.
Be sure to place the dough on a well greased pan with adequate room between each. They are going to double in size.
This picture shows the before and after of the risen dough balls.
Scoop all your dough balls onto your pans. Normally by the time you have the last ones scooped the first pans will be adequately raised that you can start filling them.

Get all your fillings ready. In this instance I made a double batch which is why I have so many filings laid out. To save money you can use pie filling but you'll have to chop it down with a food processor or food chopper so the fruit will go further.
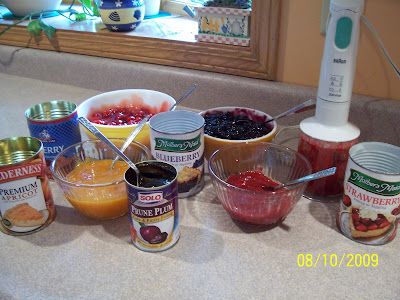
One pan at a time, start forming your kolaches and add the filling. Once again, by the time you get done with the last pan the first pan should be ready to go into the oven.


Make sure you watch these carefully. The longer I bake the shorter my baking time. Also, different types of pans bake differently.
 Alot of kolache bakers brush butter on the dough after they come out of the oven. They also like to put a sugar/flour crumble mixture on top. Both of these make the kolaches look "pretty" but in my book the extra calories aren't "worth wearing"! They taste just great "as is".
Subscribe to:
Posts (Atom)