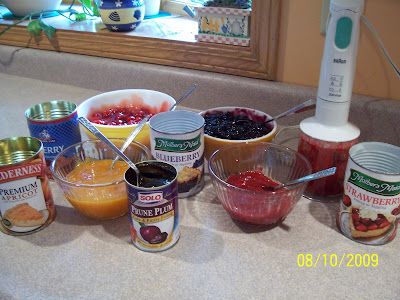
 (from top right going clockwise: apricot, poppyseed, strawberry, blueberry, cherry and prune)
From “Recipes from the Heart" – Salem United Methodist Church, C.R., IA – Pat C.
Ingredients
1 cup warm water (105 – 115 deg)
3 pkgs dry yeast (3 tbsp bulk)
2 eggs (well beaten)
1 cup sugar
½ cup Crisco (melted)
2 tsp salt
7-8 cups flour
1 cup mashed potatoes (nothing added)
1 cup potato water
Directions
Dissolve yeast in warm water. Mix sugar, eggs, Crisco and salt. Add yeast and 4 cups flour. Beat in potatoes and potato water. Beat for 5 minutes. Work in the rest of the flour; knead well and placed in a well-greased bowl. Brush top with melted butter and refrigerate overnight. In the morning, shape the dough in walnut size balls and place on a well greased baking sheet to rise. After double in size, flatten in the center and fill with your favorite filling and let rise again. Bake at 400 deg until brown, 18-20 minutes.
My comments:
1) If I don’t have mashed potatoes handy I’ve used instant potatoes with good results.
2) I’ve used evaporated milk for the potato water.
3) Make sure the warm water is NOT too hot. If it is you will kill the yeast and have to start over.
4) This dough is equally good for cinnamon rolls!
My shortcuts
1) Use your electric mixer with the bread hook to do the work. I’ve used my Kitchen Aid mixer ever since I started making these 6 years ago!
2) Use your cookie scoop for scooping the dough. The size is uniform and it is much quicker then rolling each one in your hands.

 This is the way the dough looks the night before. You cover the bowl with plastic wrap and put it in the fridge. The below picture is what it looks like in the a.m.!


Scoop all your dough balls onto your pans. Normally by the time you have the last ones scooped the first pans will be adequately raised that you can start filling them.

Get all your fillings ready. In this instance I made a double batch which is why I have so many filings laid out. To save money you can use pie filling but you'll have to chop it down with a food processor or food chopper so the fruit will go further.
One pan at a time, start forming your kolaches and add the filling. Once again, by the time you get done with the last pan the first pan should be ready to go into the oven.


Make sure you watch these carefully. The longer I bake the shorter my baking time. Also, different types of pans bake differently.
 Alot of kolache bakers brush butter on the dough after they come out of the oven. They also like to put a sugar/flour crumble mixture on top. Both of these make the kolaches look "pretty" but in my book the extra calories aren't "worth wearing"! They taste just great "as is".
1 comment:
I agree, the added sugar and butter spread aren't worth wearing. Yum!!
Post a Comment